
My friend, Pat, turned me on to the beautiful sunburst mirror decor fad. She was on the hunt for the perfect sunburst to hang in her living room and I fell in love with the one she found. Of course, she has great taste and we always end up loving the expensive stuff. However, the lint in my pocket nixed the fancy sunburst mirror and I was left to admire Pat’s from afar. Here is my inspiration sunburst mirror from Pottery Barn:
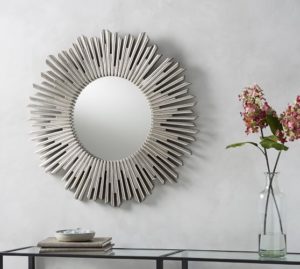
This beauty is $399 at Pottery Barn.
There is no way I’m paying almost $400 for a mirror. Nope! Not happening…even if I won the lottery. Ok, maybe if I won the mega millions. Since that hasn’t happened, I found a nice DIY substitute sunburst on Pinterest that only costs a fraction of some of those found at Pottery Barn and ZGallerie.
Here is my Pinspiration: DIY Convex Starburst Mirror
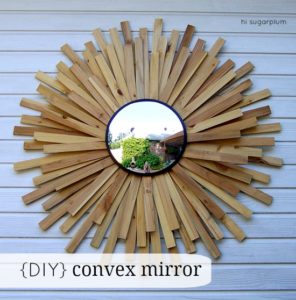
Isn’t this amazing? I couldn’t believe it was made from a cheap pack of wood shims. A sunburst mirror just like this one would fit perfectly in my newly remolded bonus room, that’s settled. Now, I need to gather all the supplies. Luckily, the directions seemed easy enough to follow and not too time consuming.
Getting Started | Sunburst Mirror
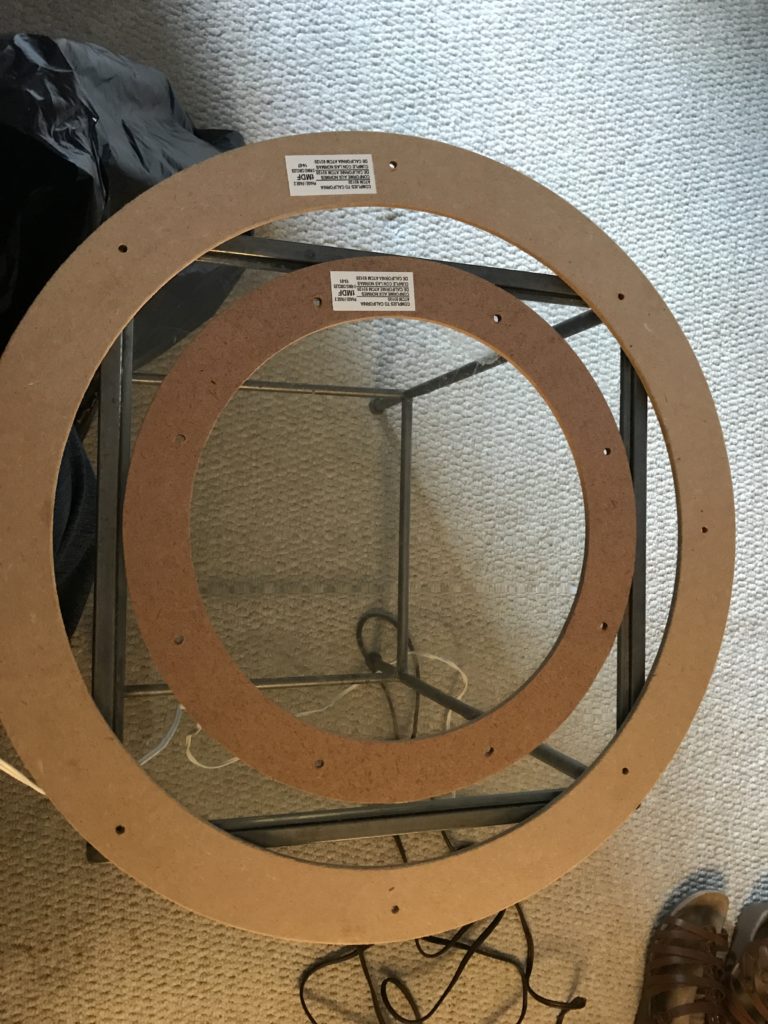
All you need are a few packs of wood shims, 2 floral rings, a mirror and hot glue. Not much at all, right? Visit here for complete directions: DIY Convex Mirror
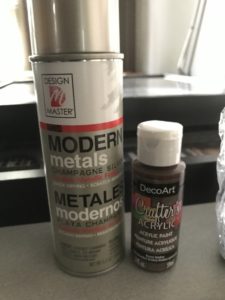
I needed a few more items because I wanted to paint my sunburst. Of course, picking a color is the worst for me and I needed to phone-a-friend.
My friend, Karen, came to the rescue and suggested that I use champagne silver spray paint and follow it up with a burnt umber wash. That would look perfect for the room! Thanks, Karen! She’s a faux painting pro with several years of painting experience and I retained about 2% of the directions she gave me about glazing, sponges, wax on…wax off..yaddah yaddah! LOL!
Now it’s time to plug up the hot glue gun and get to it. I arranged the floral rings and began layering the shims. You can paint or stain the shims beforehand, but I was too impatient and started gluing. It comes together pretty quickly and I was done in about half an hour.
 You have the option of making it all symmetrical or varying the lengths for added dimension. I decided to stagger them for a bit more dimension, but I may try a different pattern for one of these over the fireplace.
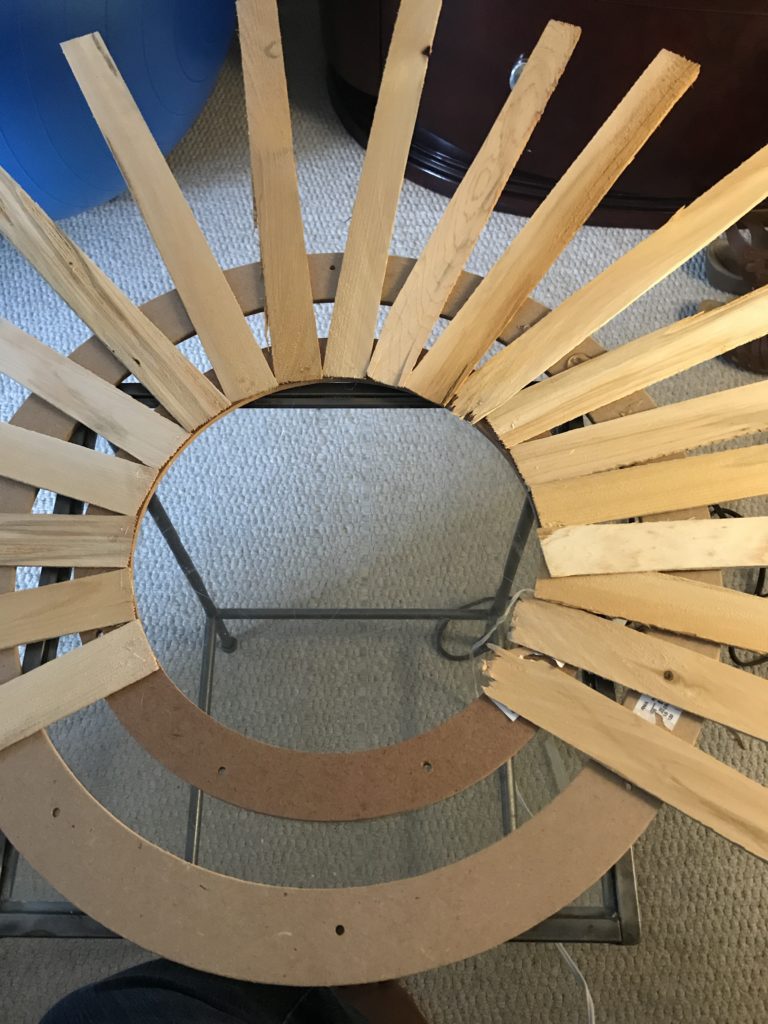 I just followed the circle around and around until I closed in the open areas of the rings.
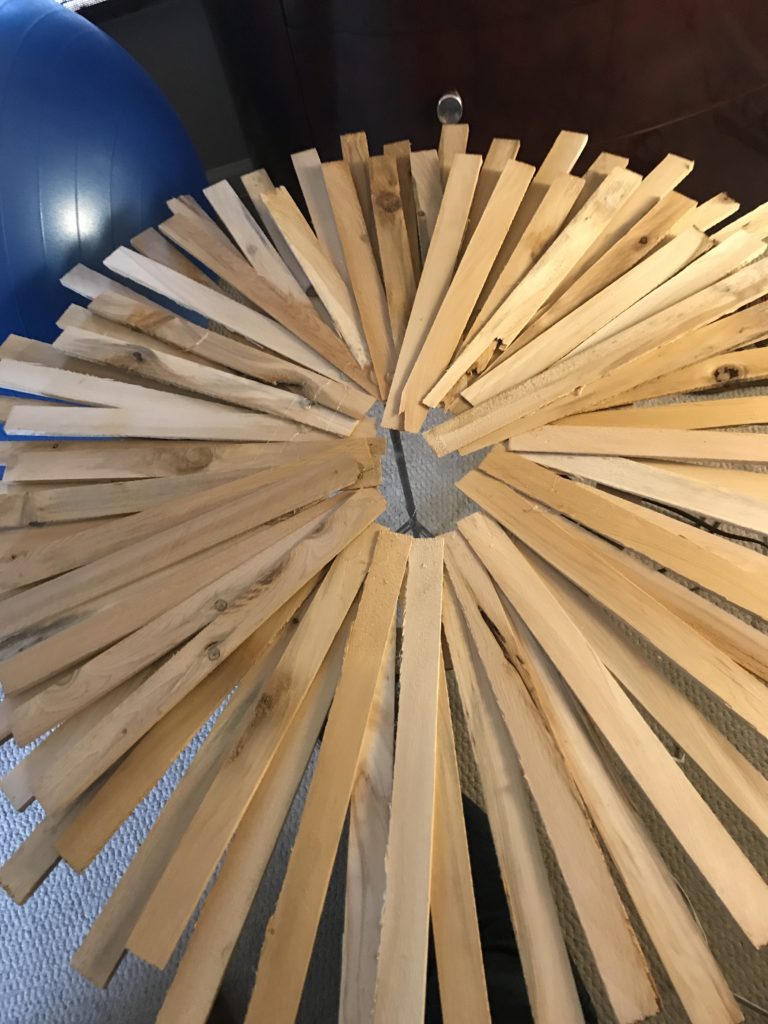
Done! I just sat the mirror on top to see if there were enough shims. This was 4 packs of shims all together. It’s huge…about 4ft in diameter.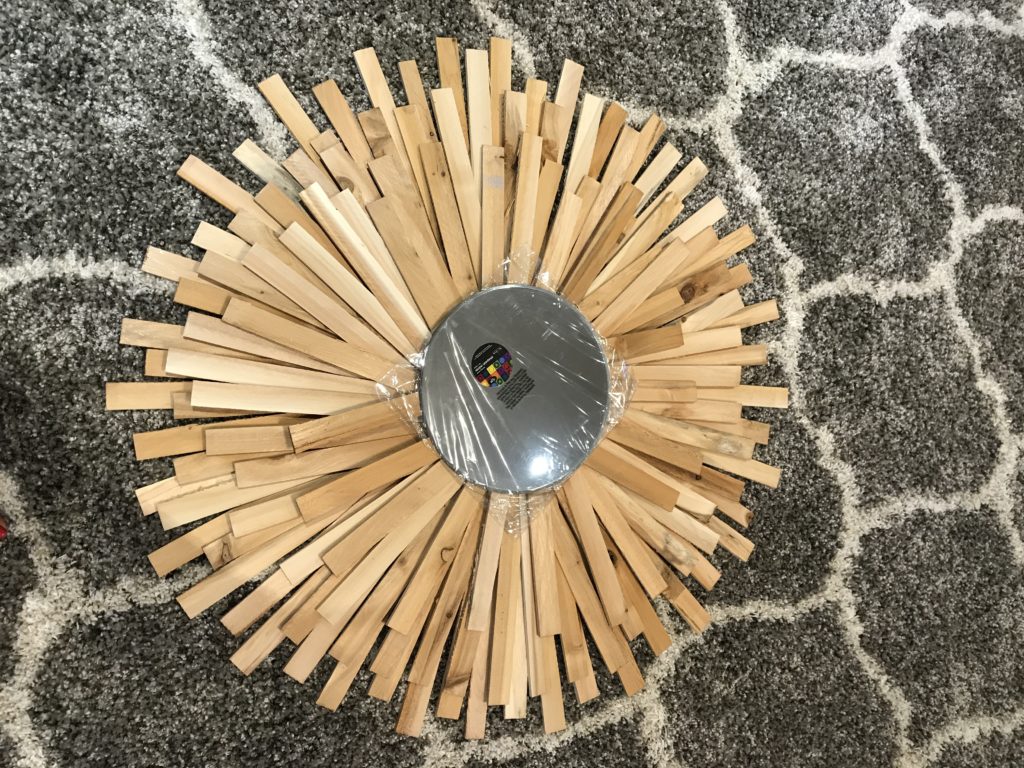
Time To Paint
Since I couldn’t be bothered with painting the shims beforehand, I had to spend a bit of time getting it completely covered with the champagne silver. Karen was spot on with the color!
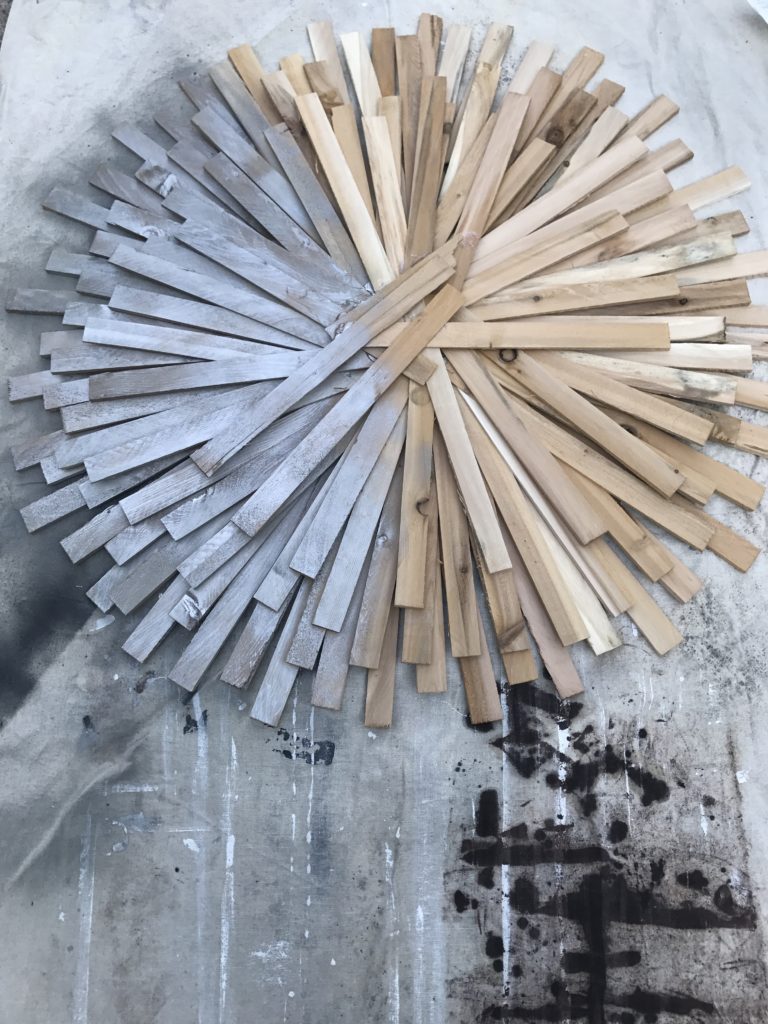 Now it’s time to start with the burnt umber wash. I really have no clue as to what I’m doing here. I end up brushing it on and wiping it off really fast.
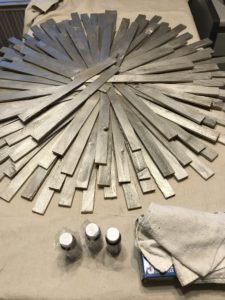
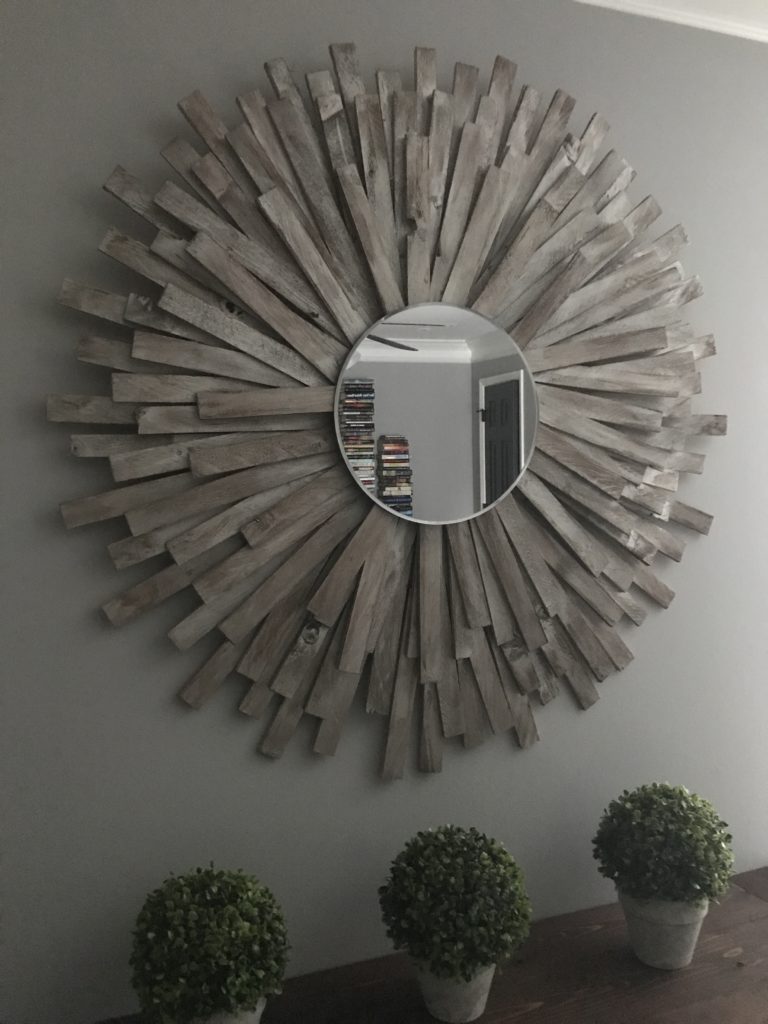
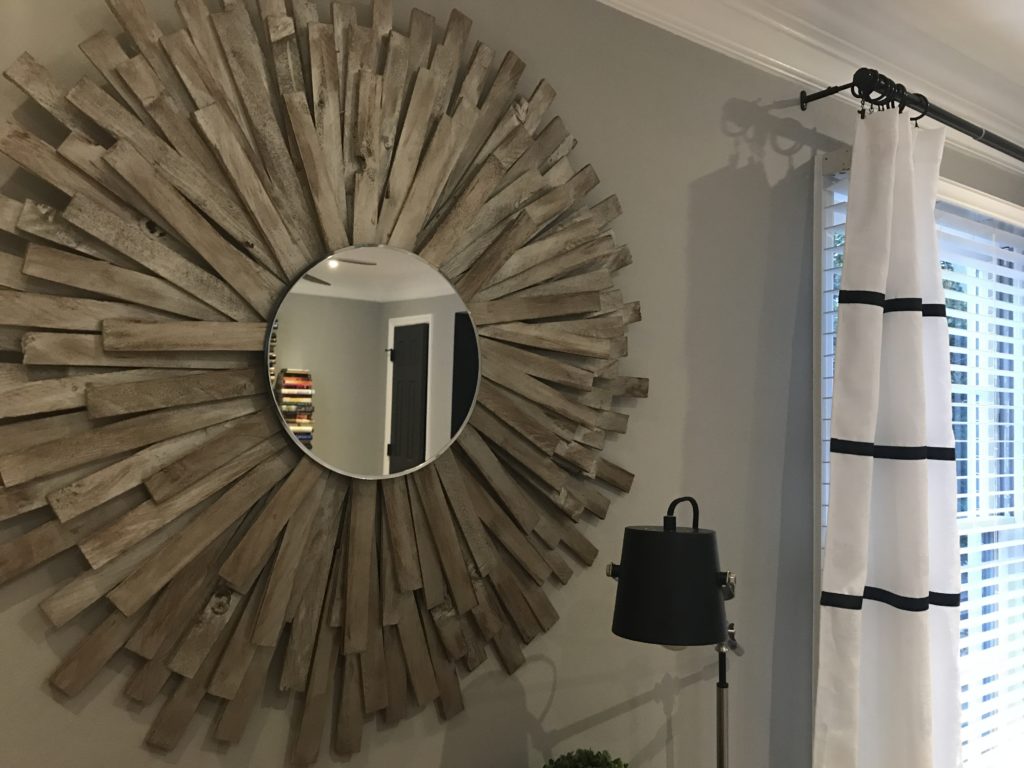
Here it is after the burnt umber wash. The dark brown color gave it an an old world look with some added depth. Yay! I love it. The day after I finished this, Karen gave me some real specific directions that I’ll be sure to use on the next one. She did give the seal of approval on my first attempt.
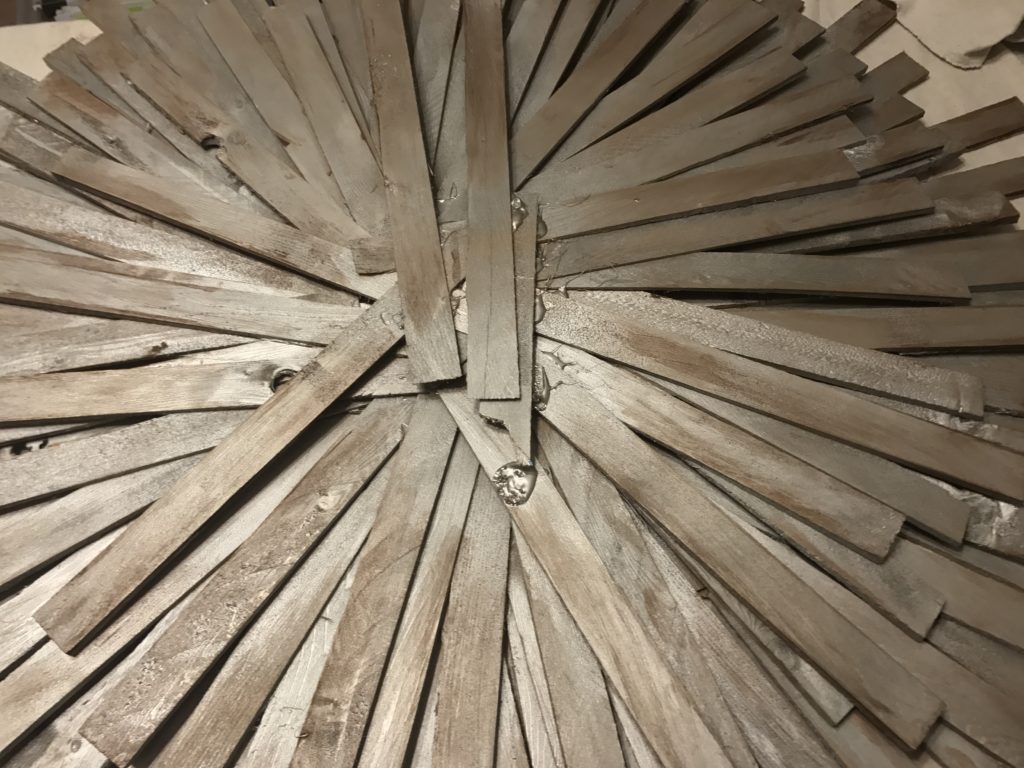
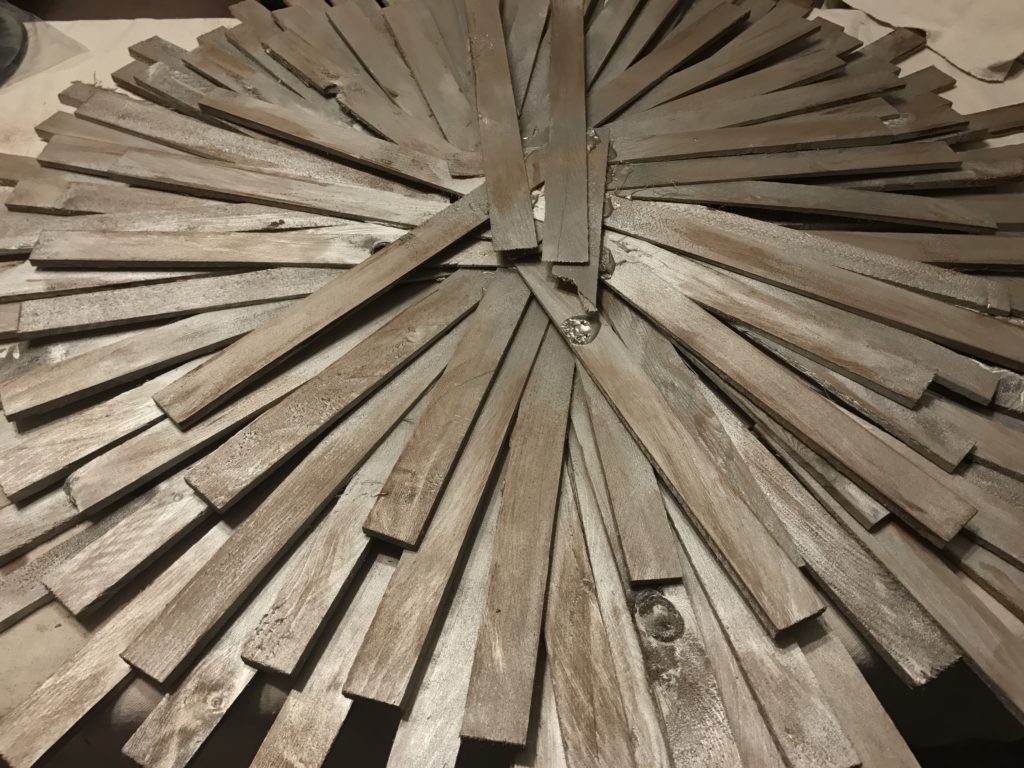
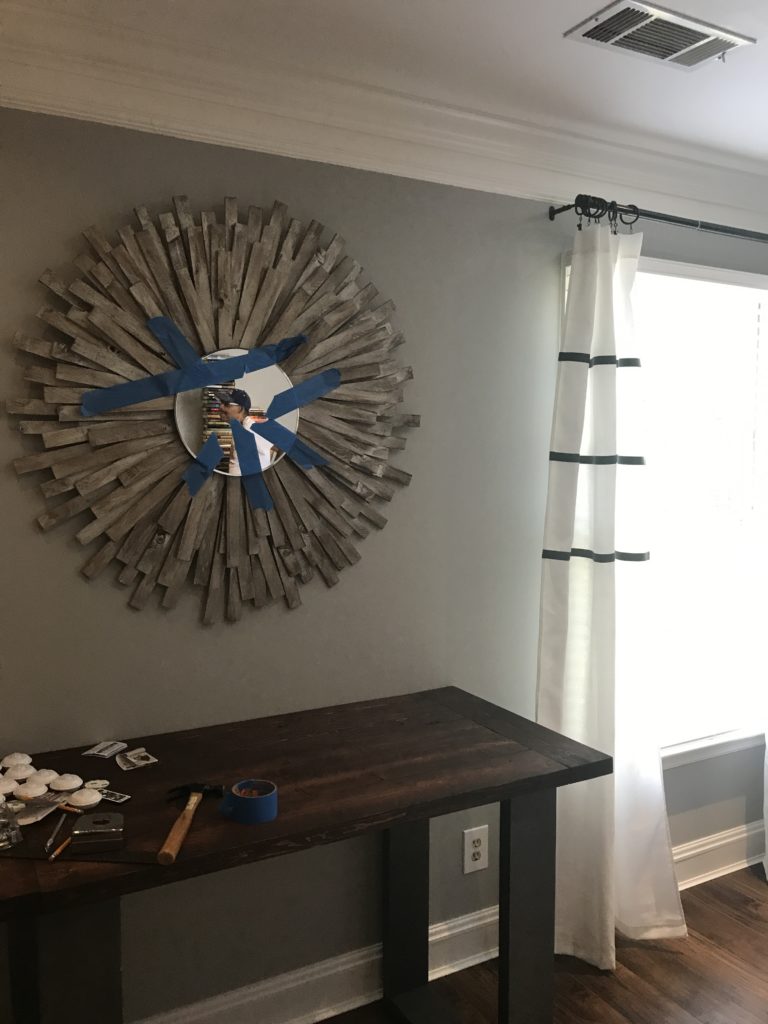
We had to attach a few pieces of scrap wood to the back for hanging purposes and I glued the mirror using mastic. You may want to add tape if you’re in a hurry to hang it, like I was.
Finished Project
The sunburst is huge and it fits the wall perfectly.
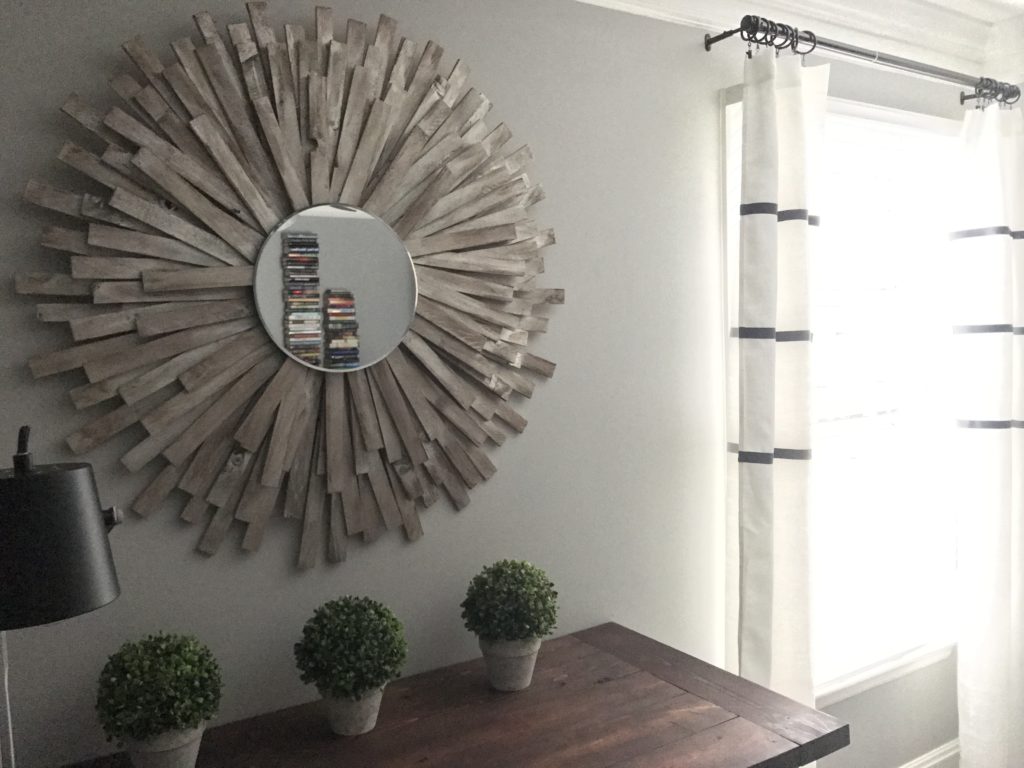
Even though it’s not an exact replica of my inspiration piece, I think it turned out nicely and didn’t have to pay $399 for it. Even better, right?
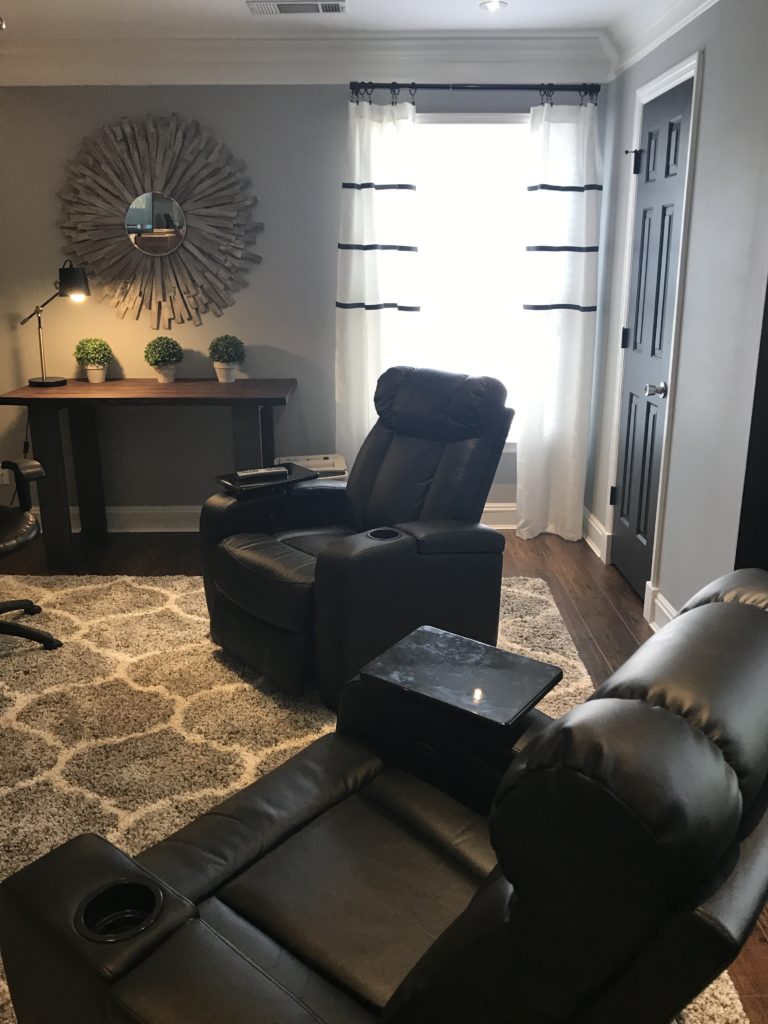
It goes to show that you don’t have to spend big bucks on artwork for your home. A little imagination with some unconventional material can make a one of a kind masterpiece become the focal point of a room. Now, on to the next project…picture frames!


Amazing!!!!! Thank you❤️
This is beautiful! I’ve been thinking of ways to repurpose an old farmhouse windmill and I think this project is perfect! The color turned out amazing! Well done!
Thanks, sunshine! I wish I had a old windmill to use around the house. You better hang that up and enjoy it. I appreciate your kind words and thank you for checking out my blog.
I can’t find the champagne silver spray anywhere!!! Where did you get it?
I found it on Amazon, but it was awhile ago. https://www.amazon.com/Design-Master-Modern-Metals-Champagne/dp/B0018N0DVY/ref=sr_1_4?dchild=1&keywords=design+master+spray+paint+champagne&qid=1608064851&sr=8-4
Okay thank you so much!!! I love the color, I don’t see myself settling for anything other!
I have to ask what we’re the instructions your friend advised and that you’ll use next time?