
I think trim can instantly upgrade the look of a room just as much as paint. Builder grade trim used in the 80’s-90’s was wimpy or non-existent in some cases. Crown moulding was mostly missing from upstairs and the baseboards were 3″, maybe. Nothing fancy about them at all. Luckily, you can upgrade those wimpy baseboards with a little DIY know how. Nowadays, you’ll find upward of 6″ thick baseboards in new home construction and it looks so upscale. During my recent room by room renovations, I’ve learned that those wimpy baseboards can easily be replaced for very little cost using MDF.
On one of my morning walks, I ventured through a new construction neighborhood for a little inspiration. These were million dollar homes and I wanted to see how far my craftsmanship was off compared to the professionals. Well, I have to say that my work was none to shabby. It might take me 10x’s as long, but I could pass as an intermediate home construction worker. LOL!
After I patted myself on the back, I noticed that they were in the trim phase and I was surprised to see the bulk of the baseboard was MDF. YES!!!! Cheapo MDF made up 6 inches of baseboard in this million dollar home. Now, don’t get me wrong….they did add a pretty substantial piece of base cap, but there was still a huge piece of MDF. So, not all the trim in those high priced homes is all “wood”. So, I didn’t feel bad when I slapped up pieces of MDF for my baseboards at home.
MDF Baseboards
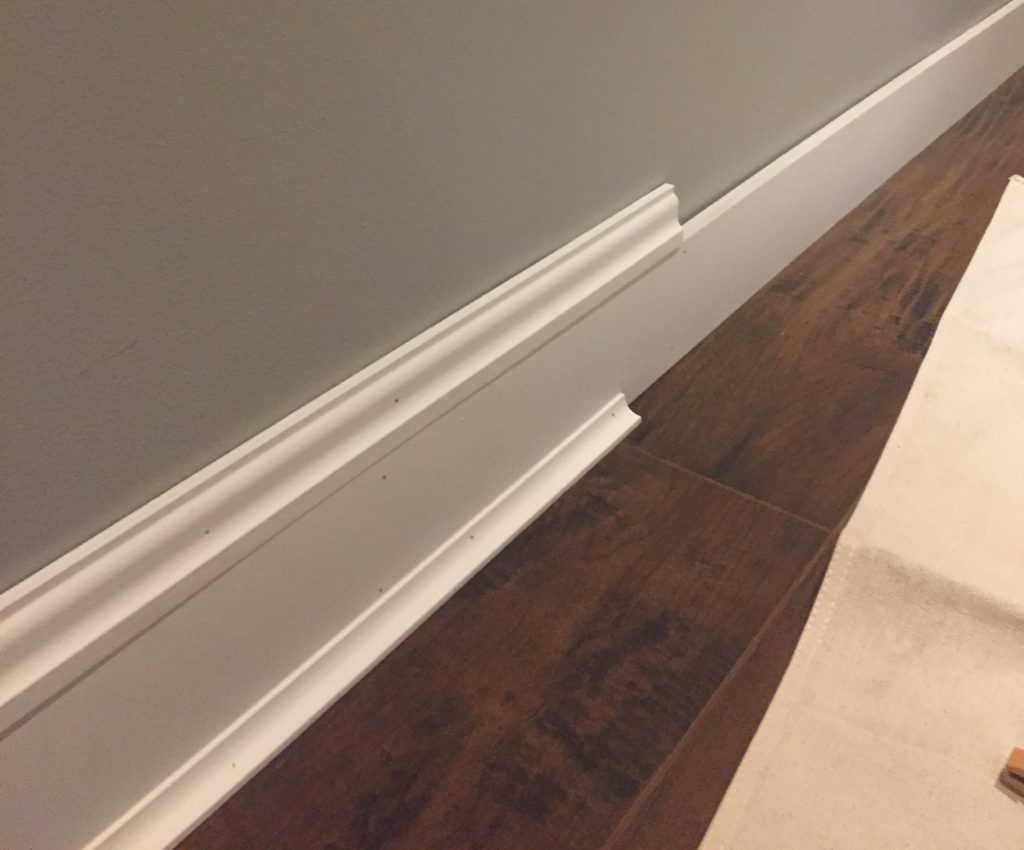
Here is the pic I took of the baseboards in the new construction home selling for a million bucks…look at that MDF at the bottom. See, when you deconstruct this it ends up not being difficult to duplicate. Anyone could pull this off with a saw, nail gun, caulk, wood putty and paint. Seriously!
Ripping off your wimpy baseboards isn’t nearly as destructive as I thought it would be. After using a cutter to separate the caulk at the seem, they pry out rather easy with crowbar. I did this so quickly that I didn’t have time to get a pic.
You can visit any of the big box home improvement retailers or a local lumber yard to create whatever combination of baseboard trim that suits your taste. This is much cheaper than buying a 5 or 6″ finished baseboard for 4-5$ per foot. Ouch!!!
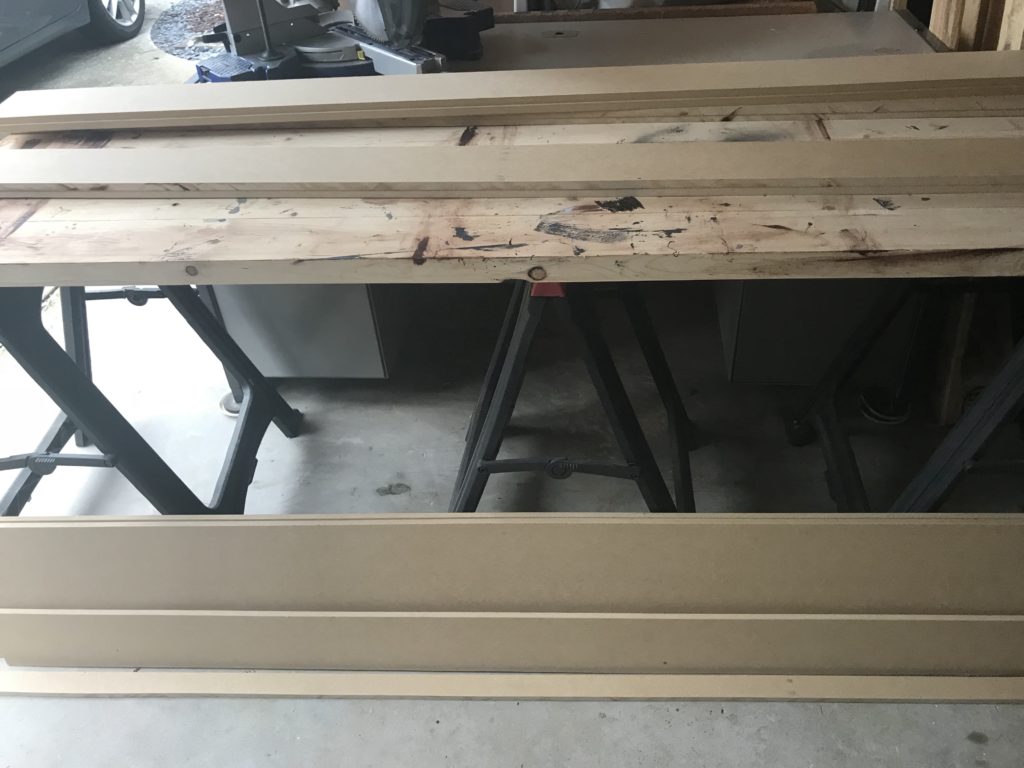
You can see in the picture below I had a sheet of 1/2″ MDF cut into 6″ strips at my Home Depot. They cut these for me at the store, but sometimes we rip the sheets using a table saw. Make sure you have a good sharp blade on your saw because you don’t want jagged edges.
Create Your Own Baseboard Style
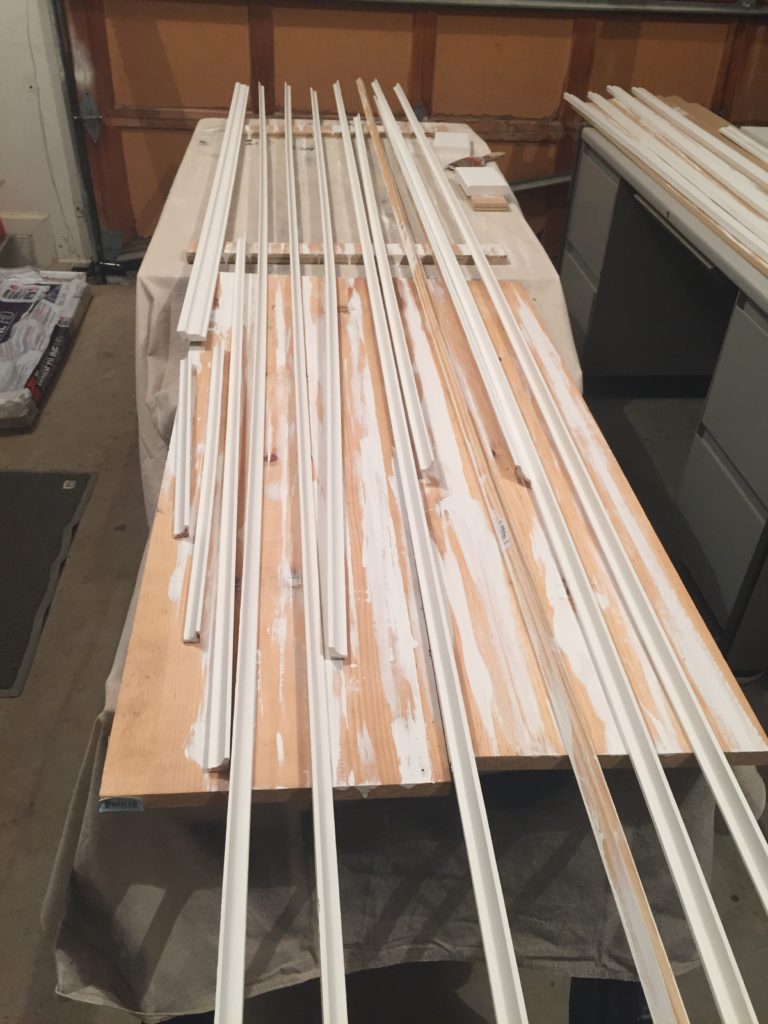
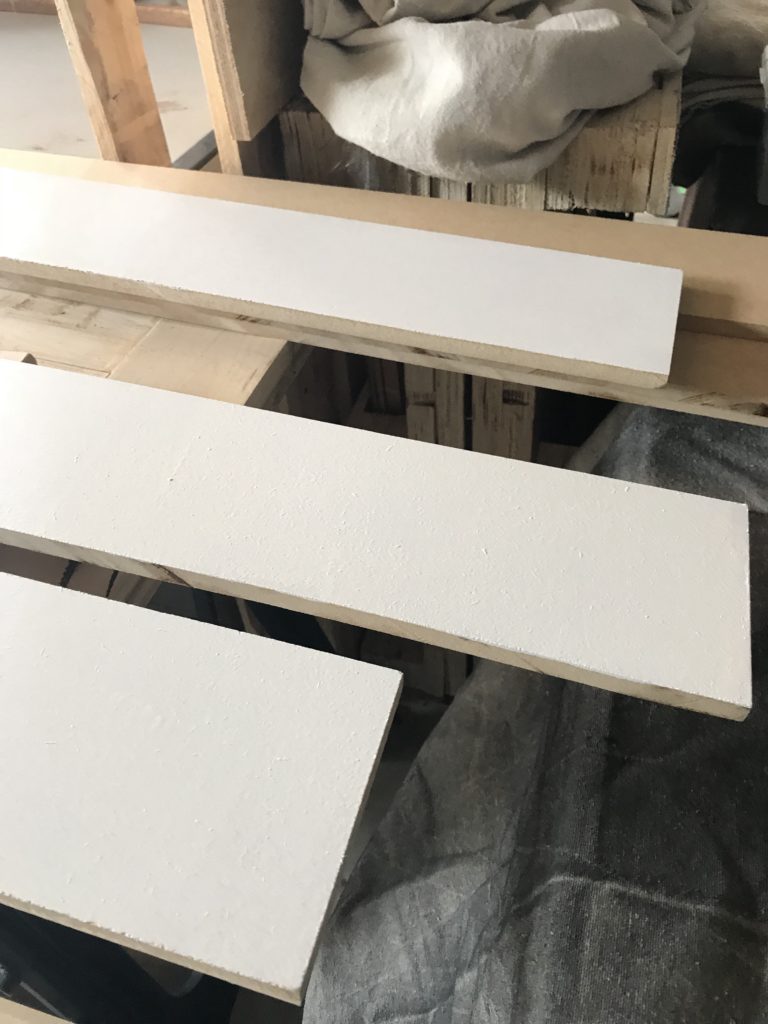
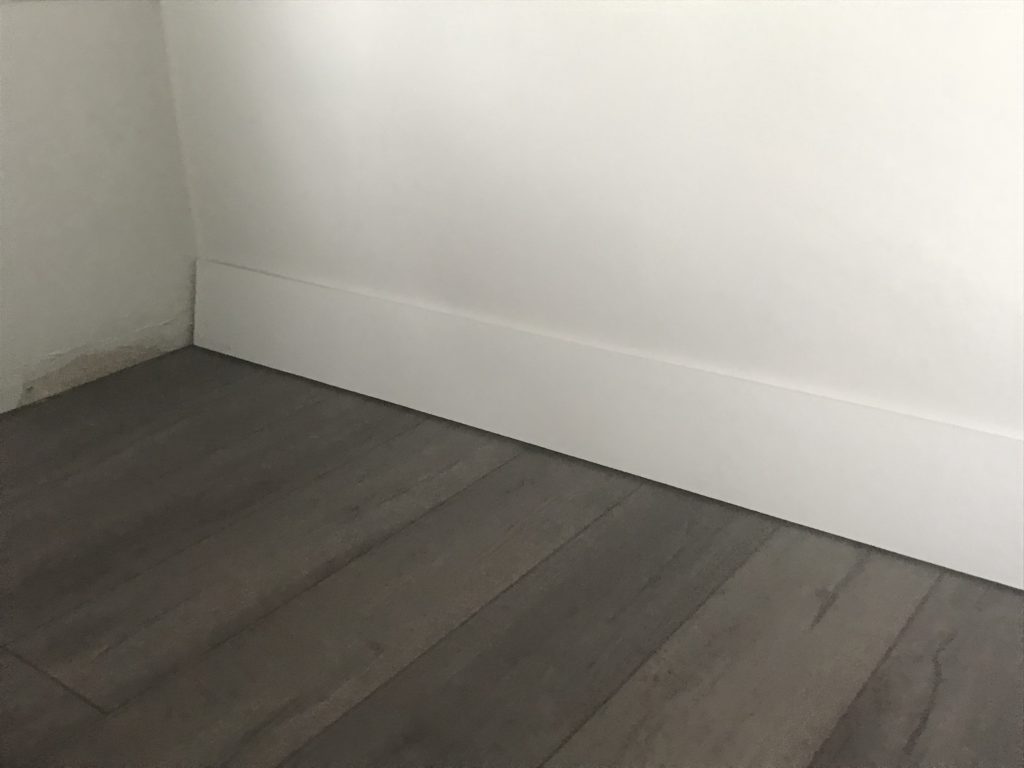
I went with three pieces to create the baseboard in my Bonus Room Makeover, but I wanted to go with a cleaner look in my Small Bedroom Makeover. In that room I only used the mdf pieces. I painted all the pieces before installing them and then touched it up where I used wood putty.
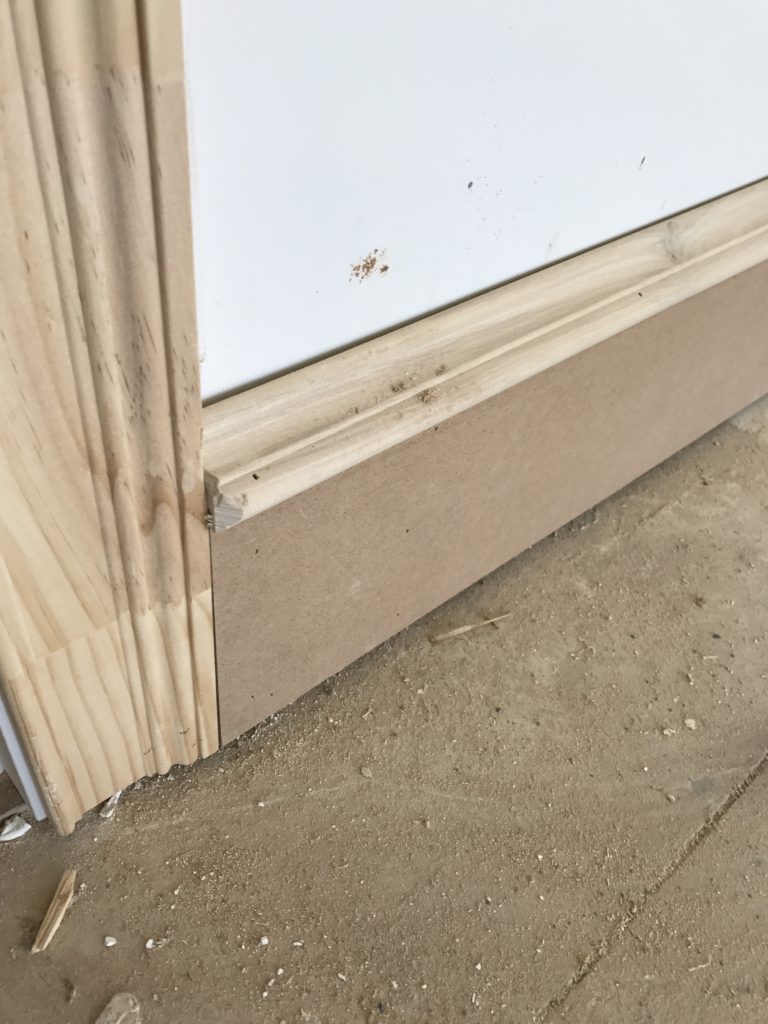
Here is a picture of the built up moulding using a base cap and shoe moulding. I’m not a fan of quarter round, so I used a piece with a inward curve instead.
Here is the baseboard after caulking the cracks, filling the nail holes with wood putty and then touch-up painting.

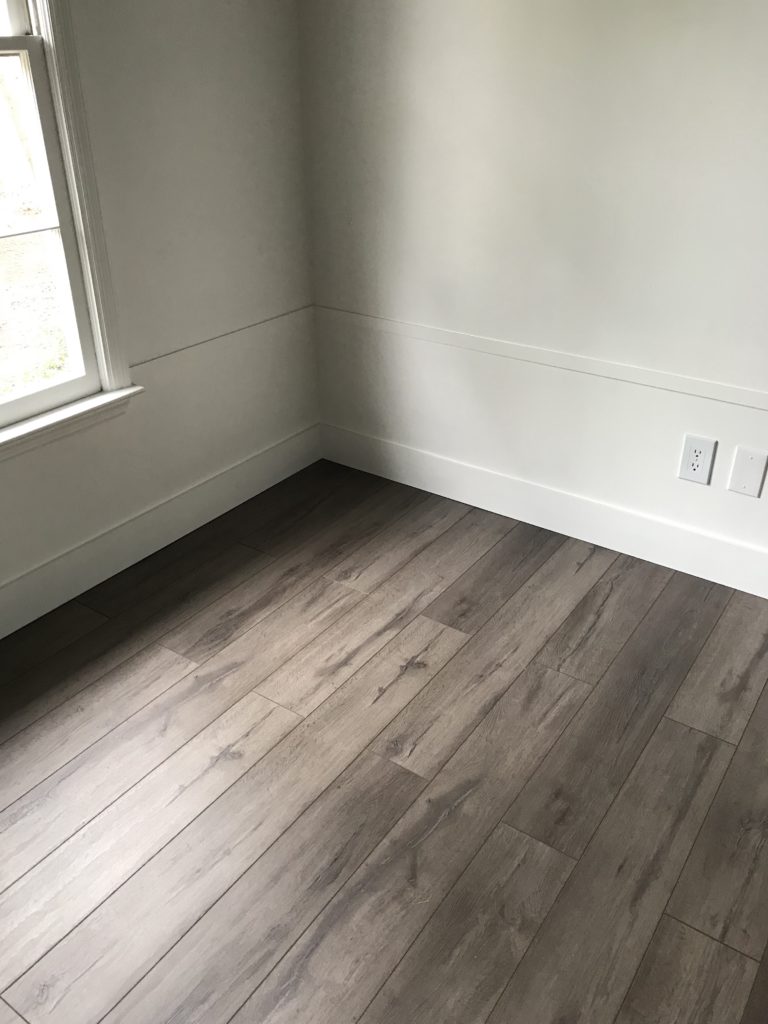
The picture below shows my most recent room renovation and this is the room where I went with a simpler looking base trim. Just one 6″ piece of MDF all around the room. Since I installed new floors in this room there was no need for show moulding either.

I’m so glad I updated the baseboards and it was an easy and inexpensive update that anyone can do as a do-it-yourselfer.


Best idea ever! I am renovating an entire house I just purchased and was stumped at how to have awesome baseboards without the expensive price tag. Thank you!
I felt the same way when I saw other DIYers doing this. You’re going to love it. I wish I had gone with a little higher board, but I still love them much more than the old wimpy ones. Good luck on your project!
Hi, Loved how your molding turned out. By chance do you have the measurement of the bas cap you used? Thanks
Hi! Thank you. The base cap is about an inch and I got it at Home Depot. The entire width of the base board is 5″ and I kinda wish I had another inch. Oh well!
Wow, you did a great job! I also love the grayish flooring in the last picture. Do you have the make and color name for that?
Thank you!!! I love that floor, mostly because my dog sheds profusely and his hair is about the same color as the floor. LOL! I got this laminate from Sam’s Wholesale Club and it’s Select Surfaces Flooring in Silver Oak. It’s great quality flooring, easy to install and budget friendly. You can order it online as well.
Genius! Thanks for the great idea.
Hope you give it a try!!!
Thank you so much for sharing this tutorial! We are updating our home here in Statesville, NC & I am dying to modernize our baseboards. We are doing some kitchen cabinet refinishing this weekend so maybe this will have to be the next home project on our list. Thanks again!
You’re working on the next project on my list! Lucky you! New wider baseboards will make a huge difference, especially with a coat of bright white paint. You’ll love it.
Finally someone who doesn’t just paint the wall two inches higher as a way to beef up baseboards..I am all for saving money but not to the point where it is actually fake.. also hate quarter round so I am wondering if the stuff you used in place on quarter round is cove moulding because I love it!!! I also agree about the hefty costs of baseboards and love the look you did with the MDF board..it’s so clean and crisp…